The easiest method to convert a Virtual PC virtual machine is to use the VMware vCenter Converter provided by VMware. It can be found here. Free registration is required. Once you have downloaded, and installed the converter the following instructions should get you through the rest of the conversion process.
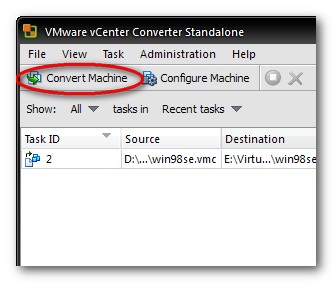
After installation is complete, launch the converter. Once the converter is open select “Convert Machine” as shown below.
A new window will open, and you start by specifying the source details. In order to convert a Virtual PC VM, select “Backup image or third-party virtual machine”. Then click “Browse…” and locate the VM you need to convert.

Hit “Next” and you make decisions on how the converted VM will be configured. Start by selecting “Select destination type:”. Home users will choose “VMware Workstation or other VMware virtual machine” as the resulting Virtual Machine (VM) will work with either VMware Player or Server. The other option is “VMware Infrastructure virtual machine” which is used with ESX or vCenter Server products, which will mainly be found in corporate setups.

You now can name the virtual machine as you desire so it is easily identified when you want to use it. When specifying the location, make sure the directory exists because the converter will not handle this for you. If you hit “Next,” the Converter will nag you that it doesn’t exist and won’t let you proceed.

Hit “Next” and review the settings for he virtual machine. Here you can adjust hard drive, RAM, and Network settings for the final VM.

I am converting a Windows 2000 machine which initially had been assigned a small amount of RAM. I boosted mine to 512MB to improve performance of the VM. Make a decision based on the host computers actual RAM, and the guest OS requirements you will be running which is best for your setup. The yellow exclamation points are items which should be reviewed. In my case, the “Processors” is set to one. Although your computer might have a dual core, don’t increase the number of processors, especially in older OS’s as this will require manual update of components after the conversion. The other item requiring my attention referred to needing sysprep files. (After some investigation, I determined I would try the conversion without them, and everything went fine.) You can ignore this, and hit “Next” to move the process along. On the next screen take a second to review that all the settings are as you want, and hit “Finish” when you are ready to proceed.
The conversion process can vary depending on the systems being converted. With the VM’s for Windows 98, and Windows 2000 it took about a minute, but for a Windows Vista VM it took about 10 minutes. Times will obviously depend on your computers specs as well. I ran this on a AMD Athlon 64 X2 5600+ with 2GB of RAM.
If everything went as planned, you should have a new VM which work in your preferred VMware product. Hope that helps.

Recent Comments